Elementor เป็นเครื่องมือที่ช่วยให้เราสามารถสร้างเว็บเพจได้แบบสดๆ ออนไลน์ หมายความว่าเราสามารถสร้าง homepage, landing pages, blog posts, ได้อย่างรวดเร็ว และง่ายดาย รวมถึงการคัดลอกเว็บอื่นๆได้ดีอีกด้วย.
Elementor is a visual page builder that lets you design your website pages in a live, visual way. This means you can create your homepage, landing pages, blog posts, and all other site pages and posts in the easiest way possible.
Before we get started, we recommend you watch this short 2-min video intro, showing you the building blocks of the Elementor editor.
To start working with Elementor, go to the WordPress dashboard.
Then, add a new page by clicking on Pages > Add New.
Then, click on the ‘Edit with Elementor’ button.
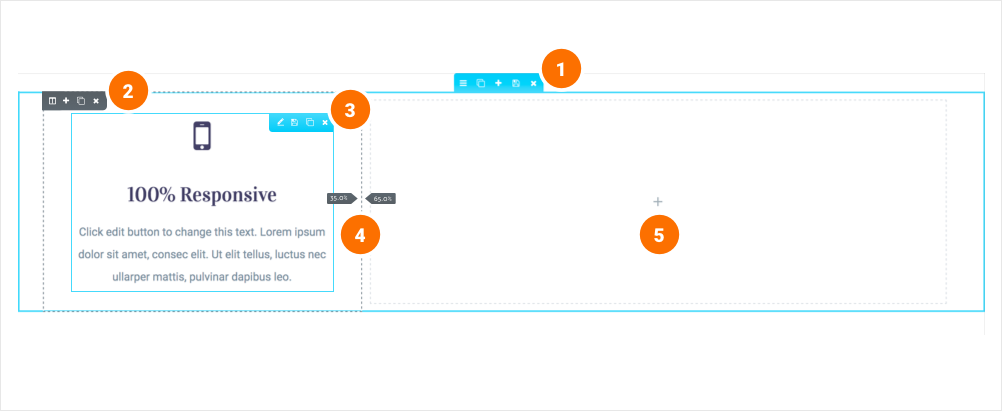
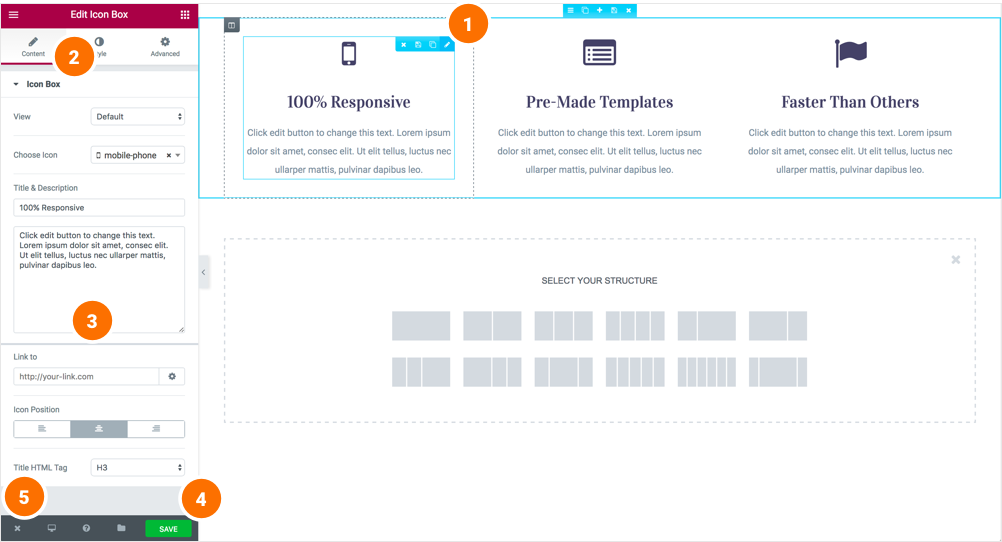
The Elementor page builder includes these main areas:
1. Panel (Top): Use the search field to find a widget.
2. Widgets / Widget Settings: Choose a widget and configure it.
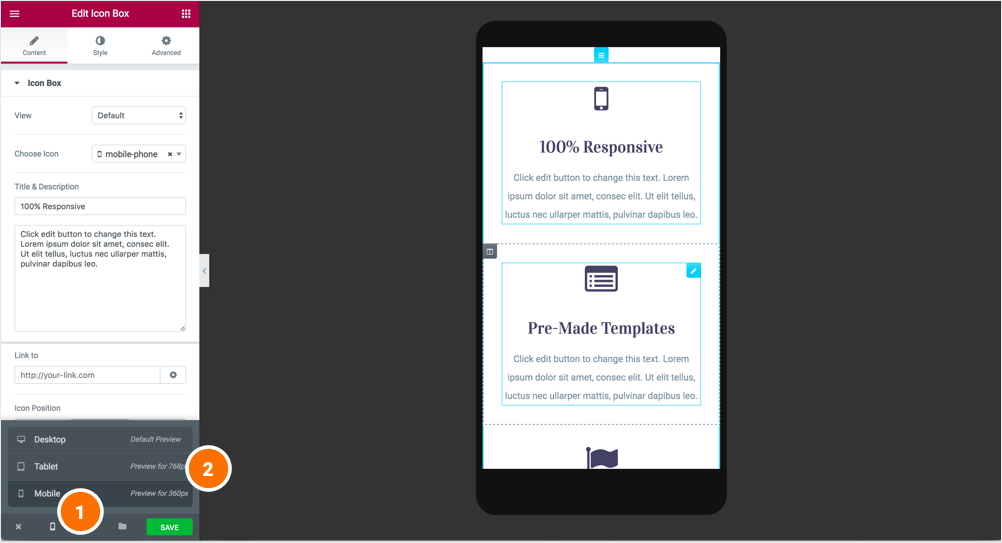
3. Preview Button: Enables you to preview the page. Once clicked it hides/shows the panel.
4. Panel (Bottom): View page, Go back to Dashboard or Save page.
5. Content Area: Drag & drop widgets and design your page.
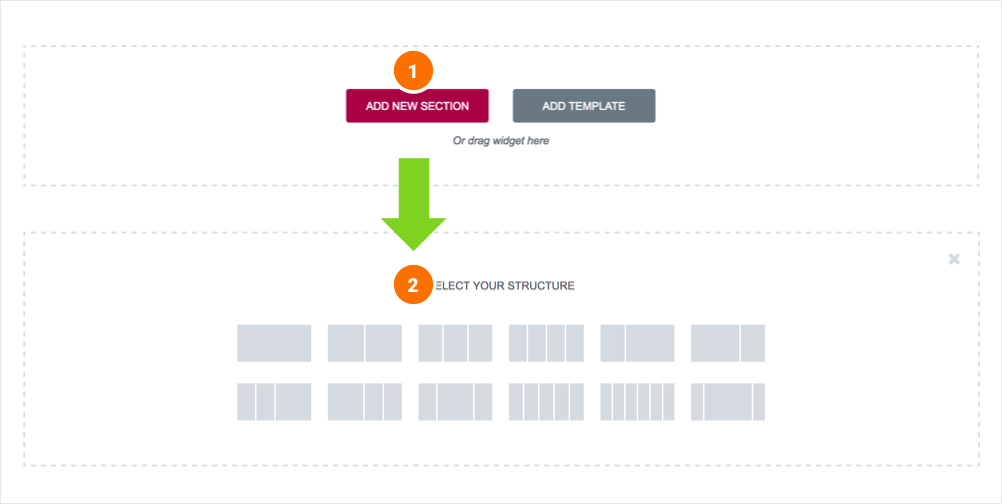
6. Add New Section / Add Template: Choose between creating a new section or inserting an existing template.
A section is the most basic element that you can work with.
It’s the building block of every page. A section can be set as full width and spread all over the screen, or receive the content area width (by default).
After you create a section you can drag and drop a widget inside. You can also divide each section to few columns. Every page you create can contain as many sections as you want. You can drag a section above or under another one to relocate it.
1. Add New Section: Click this button to create a new section or simply drag a widget from the panel and drop it in the content area.
2. Select Yout Structure: Choose a structure for your section (Later, you can edit the exact width of every column).
You can edit, duplicate or delete a section. You can also save it as a template or add a new section above.
.
Click on the ‘Add template’ button to launch the Template Library and insert one of our pre-designed templates or one of your own.
Every section includes one or more columns. You are able to insert your content into each column.
You can easily arrange and order the columns, simply by dragging and dropping them.
You can edit, duplicate,
add or delete a column. You can also drag & drop it anywhere on your page. Resize Column: Drag right & left to change the width of your columns.
Click the content to edit, duplicate or delete a widget. You can also save it as a Global Widget. Add Widget: Drag a widget from the left panel and drop it into a column.
1. To edit a widget, click the pencil icon.
2. On the Panel header, you can choose to edit the widget’s content and style.
3. Every widget has a different setting.
4. You can save your current changes at any stage.
5. When you have finished designing, click the ‘X’ button at the bottom panel and view the page.
1. To view how the page looks like on different devices, click on the Responsive Mode button, in the footer.
2.Choose between the different devices.
This tutorial will go over the style options for sections and columns. You will learn how to change that background color of sections, set image and video backgrounds, set background overlays, border and box shadow. You also get a lot of options to style your columns
In this tutorial, we’ll walk through the advanced settings. The advanced tab saves you from adding CSS code to change the layout of the page.